Saturday 23 August 2014

Next 3 Weeks

 
I have been convinced to take a break.  Scott twisted my arm!  I have not closed the blog for good just 3 weeks.  The fridge is empty the cooker turned off and a nice person in a restaurant is going to serve me drinkies and dinner.

 
See you in 3 weeks with some stories, photos and new recipes to trial on the crash test dummies.

Saturday 16 August 2014

Savoury Scone Roll


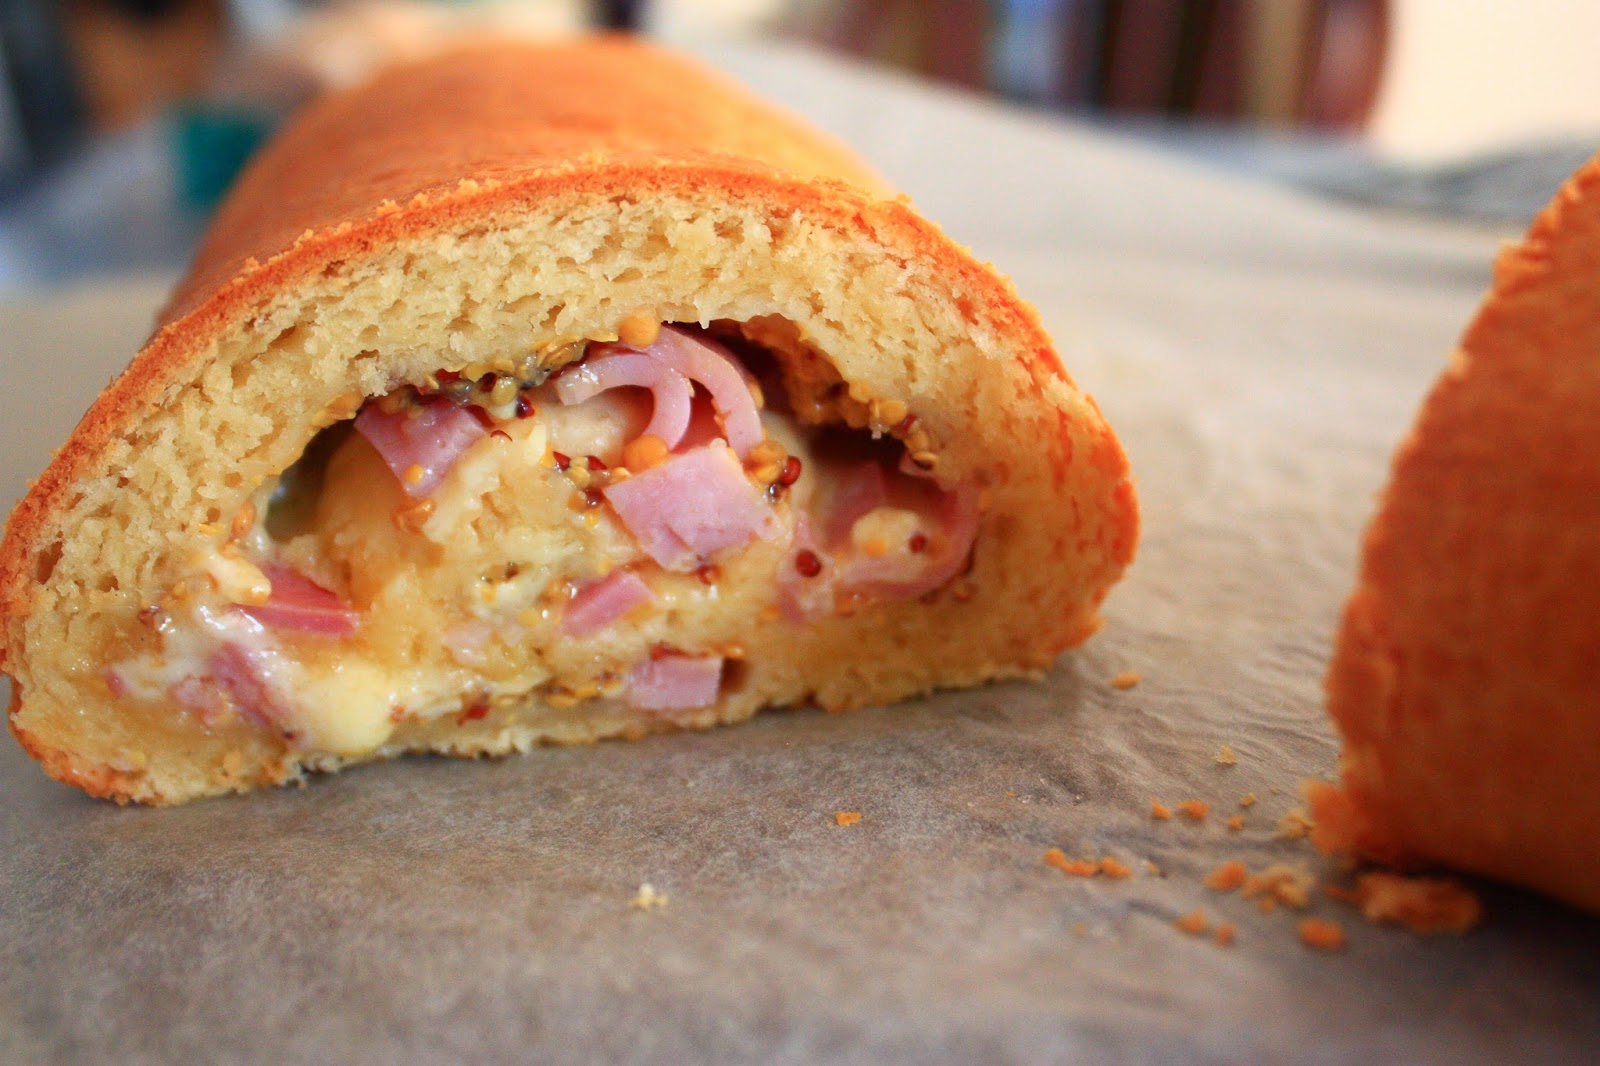
This is such a crowd pleaser!  You can make it ahead and cook it when you are ready.  Slice, serve and watch it disappear. Oh and if you are smart you will grab the two end bits for yourself before you serve it.  The end bits are yum and well to tell you the truth everyone leaves them but they have heaps of the yummy bits in them as well.
 
 
One warning... don't be tempted to go overboard with the mustard, it can be super strong and overpower the taste.
 
 
Scone Dough.
 
2 cups self raising flour
1 to 1 1/2 cups cream
1 pinch of salt
 
Filling.
 
2 rashes of bacon (chopped)
1 cup grated tasty cheese
1 tablespoon wholegrain mustard


Combine the flour, salt and cream in a bowl and with a knife mix together until combined.

 
Press together with your hands and when most of the mix forms a ball turn out onto baking paper.


Knead your mix until it forms a smooth ball.

 
Roll your dough into a ruff rectangle about 1/2 cm thick, it is easiest to do this on a piece of baking paper.

 
Spread your mustard over the dough leaving 1 inch with no mustard along the edge furthest from you.

 
Sprinkle evenly with your chopped bacon.

 
Sprinkle evenly with grated cheese.

 
Starting with the edge closest to you, fold over and roll, use the baking paper to help you achieve a tight roll.


Gently press the end down to the dough and turn over so the edge is on the bottom of the roll.

 
Transfer edge down onto a fresh piece of baking paper on a sheet pan and refrigerate for at least 30 minutes.  You can leave for a couple of hours if you need to for a party.
 
 
Bake in oven pre heated to 200C for 20 minutes.  Remove and allow to cool for 5 minutes before slicing.  Serve and remember to eat those end bits yourself so you don't miss out.


Saturday 9 August 2014

Apple and Cinnamon Fritters


This was a trial recipe I found on the weekend.  It took me less than 5 minutes to prep and 5 minutes to cook and 30 seconds for the Crash Test Dummies to inhale.

I got a double thumbs up from younger and a huge cinnamon smile from elder so I think this recipe is a keeper.

1 cup plain flour
1/4 cup castor sugar
3/4 teaspoon salt
1 1/2 teaspoons baking powder
1 teaspoon cinnamon
1/3 cup milk
1 egg
1 cup chopped apple or 2 apples chopped into approx. 1cm pieces


Coating
1/2 cup castor sugar
2 teaspoons cinnamon

 
Peel, Core and chop 2 apples into 1 cm pieces, toss in a squeeze of orange juice.
 

Combine flour, sugar, salt, baking powder, cinnamon.


Stir in milk and egg until just combined.


Fold in apple.


Pour oil into skillet so that it is approximately 1 1/2 deep. Heat oil on high. Oil is ready when a little dough thrown in floats to top.


Carefully add dough to oil in heaping teaspoons. Cook until brown, about 2 minutes, then flip.  Cook another 1-2 minutes, until both sides are browned.


Transfer briefly to paper towels to absorb excess oil, then transfer to the bowl with the sugar and cinnamon set aside for the coating. 


Toss in sugar mixture and serve.

Sunday 3 August 2014

Chocolate Sorbet


Chocolate I hear you say?  Yes Chocolate Sorbet!  No Dairy.  No Gluten.  Wish we had this recipe when I was a kid, then we could have enjoyed chocolate sorbet all the time. 

My wonderful little brother is allergic to Dairy and in the 70's and 80's there was not the Dairy free movement there is now. 

I must say some of the things my Mum tried were a success but wow there were some shockers as well!  No offence Mum, but, well the mince steak stew is one I won't feed my family!

1/2 cup Cocoa Powder
1 cup sugar
2 cups water
1 shot espresso
1 pinch salt


In a sauce pan combine all the ingredients and heat, stirring until combined.  Set aside and allow to cool.  Place in plastic container in the fridge to chill.  This is best done the night before.


Place in ice cream maker and churn as per manufacturers instructions.  Placed in the freezer for at least 4 hours.  Serve


Saturday 2 August 2014

Poaching Fruit


I opened a couple of jars of my preserved apricots from summer the other week and made the apricot tart.  I have had a couple of friends ask about how I cooked the apricots and could they do this without having to put them in jars and the preserving side of it.

Poaching fruit is a nice easy way to use up fruit in the fruit bowl, if there is an abundance of a particular fruit in season.  You can poach the fruit and eat straight away or keep in the fridge in the syrup for a week. 

Poached fruit is just like tinned fruit only better.  For the sugar syrup there are three types of syrup, light, medium and heavy.  For a basic poaching syrup I prefer a light syrup but each to their own.  The quantities are below.

Light

1 cup sugar
2 cups water

Medium

1 1/2 cups sugar
2 cups water

Heavy

2 cups sugar
2 cups water


Place the sugar and water in a saucepan and bring to the simmer.  The sugar will dissolve, give it a quick stir before adding the fruit.


Fruit, you can use any summer stone fruit i.e. Peaches, Apricots, Plums, Pears, Pineapple.


Cook the fruit on the lowest flame with a piece of baking paper over the top of the syrup to ensure the fruit stays in the liquid.  Cook until the fruit is tender.  Take off the heat and if not using straight away allow to cool in the syrup.


If you wish to keep in the fridge, store in the syrup in airtight plastic container for up to a week

I love to serve warm with hot custard during winter.  During summer serve cold with ice cream or if you feel a little decadent serve with a chocolate or vanilla panna cotta.